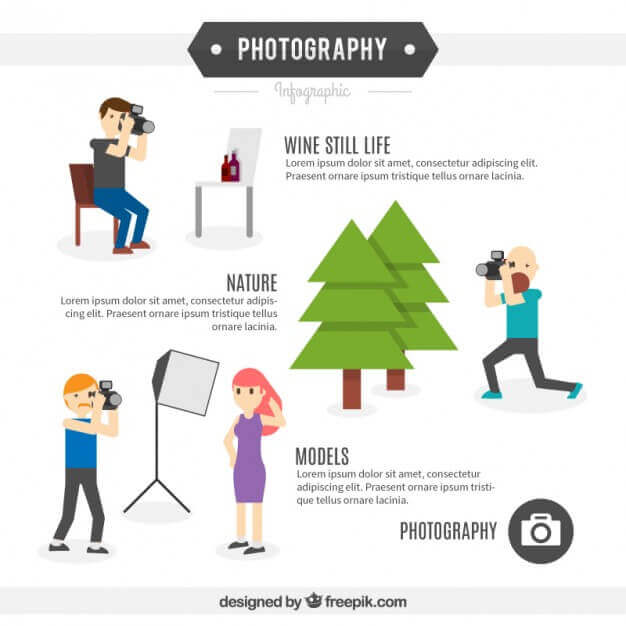
Outdoor photography includes a whole series of scenarios such as landscapes, nature, macro photography, and fauna, which makes it perfect for experimenting with techniques and compositions that we often overlook as they are not part of our DNA or with which we are not comfortable.
Whether it’s photographing some fascinating views or a group of mushrooms at our feet, the key to getting good results is preparation as usual., because once out you can end up in wild environments where it is not possible to find that object that we forgot at home.
This means that, before venturing out on our photographic safari outside, we must take care to prepare everything in detail without obviously exaggerating: even the weight of excess equipment can be a problem of no small importance.
Also read: Best Canon Lens For Portraits and Wedding Photography
Outdoor Photography Detailed Guide 2025
Table of Contents
 The backpack
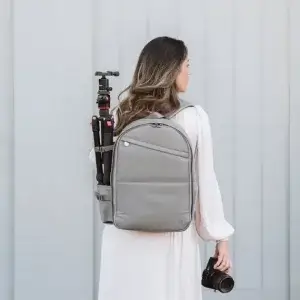
If you intend to carry everything with you, you will need to invest in a large, light but strong backpack, the ones with padded dividers and quick openings. Obviously, concentrate your research on backpacks that are waterproofed and that are equipped with padded and wide shoulder straps: in the long run they will make a difference. A good backpack does not cost very little but it is still an investment: plan to spend between € 100 and € 200 for something good. Do not skimp on the size: maybe large is more uncomfortable as it is bulky but it allows you to also house that zoom lens you are thinking of buying …
Also read: why do photographers always wear black?
The accessories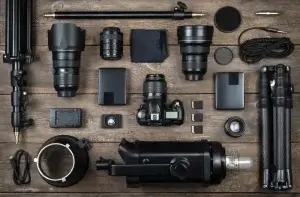
Bags (or pants) with lockable pockets with zipping are ideal for not losing your keys or wallet but are also excellent for attaching small accessories such as memory cards, a pen, some lenses, and cloths essential for cleaning optics and lenses. And don’t forget to put spare batteries and a selection of filters (only the ones you need) in some pocket. It is a good idea to bring some small spare clothing, especially a water cape or something that can cover you such as a sweatshirt.
Sudden climate change could damage your photo trip. Still in the battery sector, there are external batteries to be used as an emergency recharging point: you may not need them for your camera but they are great for cell phones and other small electronic devices that you will have with you. Also do not forget a flashlight, always useful and not bulky.
Also read: Best Strobe Lights For Photography
 The tripod
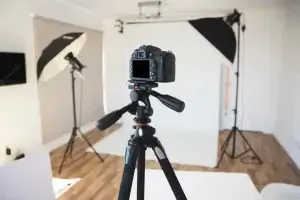
For most of the subjects, you will be able to capture in outdoor photography, a tripod is necessary. Select a light one (for example those made of carbon fiber) that have the possibility of lowering to ground level (therefore the central rod must be able to be moved or eliminated). The tripod must obviously be stable (you can increase stability by introducing a weight between its legs) and the head of the tripod must be as fluid as possible. Regardless of the type of tripod you opt for, equip yourself with a case: it will allow you to carry it more easily and protect the head the same from dust or water.
Outdoor photography: The lenses
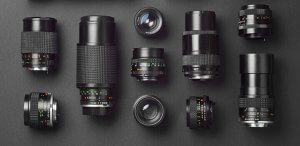 A selection of lenses covering a good range of focal lengths will ensure you can photograph any subject – from wide-angle for landscapes to telephoto for wildlife photography. I would also suggest a specific lens for macro photography (not essential) and one with a great brightness (like a 35mm) to be able to photograph in low light conditions, for example in a very dense forest.
The plastic bags
The plastic bag is essential, but at least five or six in the suitcase. If you get caught by a flood while you’re out, put one on top of the camera, punch a hole in the bottom, and pop the end of the lens out of it. Then seal it to the lens using the lens hood (a rain cover is always a boon for photographers). A bag is also useful if you have to lie down on the ground and want to avoid direct contact with the ground (perhaps muddy): spread them out on the ground like a carpet and lie down on it. A bag is also useful to make, with rocks gathered around, a ballast to anchor your tripod.
 The Phone
Make sure the phone’s battery is fully charged and place it (especially if you are in a cold environment) in a pocket as close to your body as possible: this will preserve battery life. It is a good idea to install a couple of useful applications on your smartphone such as maps, a compass, and emergency numbers. Without forgetting specific applications for photography such as an app that tells us the position/times of sunrise and sunsets, a light meter, or the hyperfocal distance calculator.
Tell a friend
Tell at least one person where you are going, the path you will take, and when you plan to return. Maybe from time to time do a “ping” to that person, with an SMS, a Whatsapp or a phone call.
Car in order
Check that your vehicle is in good condition: petrol, fluid levels, tires. Also take a look at the sidelights and also check the spare wheel.
Forecast
Check the weather forecast before you leave and try to avoid adverse conditions (unless you are looking for them. Depending on the type of climate you are going to work in, you may want to consider bringing more or more clothing with you. less heavy, some spare shoes, some coffee or sunscreen … I already talked about the flashlight before, and don’t forget a small first aid kit too.
What to wear
Comfort and safety are two must in the case of outdoor photography. Remember that it may take several hours before you can return, so don’t leave anything to chance. A pair of durable hiking shoes with ankle support is for example a good starting point. Thermal jerseys and rainproof waxes are two other things to never forget, just as you must remember to dress in light colors if the sun is beating hard. Reflective clothing is essential if you venture out at night, as is a hat.
 The shooting modes
Outdoor photography, as mentioned, includes a large selection of genres and you will surely find the manual mode the most flexible and fastest. But the manual mode isn’t for everyone so if you don’t feel confident enough you can try using aperture priority (if the depth of field is critical to you) or time priority (if freezing motion is essential for you). In the former case, if you want most of the scene to be in focus (as in the case of a landscape photo), just use a smaller aperture such as f / 11. Conversely, if you want to soften the area around your subject then it is better to use a wider aperture such as f / 5.6.
The priority of time it is ideal for images in which you want to incorporate a bit of “movement” such as clouds traveling in the sky, a flowing river, or branches swaying in the wind: in these cases, opt for a low speed, but be careful exposure (use an ND filter or a polarizer if you are working on a particularly bright day). If, on the other hand, you want to freeze a subject such as a moving animal, opt for a very fast shutter speed. And always remember to shoot in RAW.
Avoid camera shake
Using a long exposure means keeping the shutter open for a long period of time and the slightest shot during this time period can cause a harmful camera shake. The first step is to use a tripod or rest the camera on something solid like a wall. Then shoot using a remote control or wireless control.
Alternatively, you can program the timer to start the exposure. If it is windy, ballast the tripod and arrange yourself so that you cover the camera with your body. Pay attention also to the overturning of the mirror, you can block it in order to further reduce vibrations. Make sure you have placed the tripod on a hard surface – dirt or grass can play tricks.
Energy saving
If you plan a full day trip or in any case a long period of time and you have forgotten the backup battery, apply some basic rules of energy saving. For starters, if it’s cold, keep the camera insulated when not in use such as wrapped in a spare sweater in your bag, inside your jacket, or even under your arm. Avoid using the LiveView and display unless absolutely necessary.
Minimize the time spent reviewing images and use the histogram to be sure about the right exposure. Do not delete the images, you can do it calmly at home. Do not turn off the camera: every time you turn it on / off, it consumes more energy than when the camera is on standby. The autofocus use only at the time of the photo,
Hour of the day
Sunrise and sunset can make a difference in the quality of the final photo. In order to capture the golden light typical of these two time periods (the golden hour ), you will need to arrive at your shooting position at least an hour and a half before the actual event.
Spend half an hour preparing the equipment, mount the right lens, fix the camera on the tripod, decide on the composition, make sure the horizon is straight, and program the desired values. If you are using a tripod, turn off the image stabilization and opt for a suitable ISO (ideally between ISO 200 and 800).
The best light, I remember, comes one hour before sunrise and one hour before sunset: this is why it is necessary to arrive early on the scene, in order not to lose the right light.
The great outdoors can offer some beautiful subjects for night photography and by using a long exposure to the light of the moon you can shoot all elements of a scene in an excellent way.
Alternatively, if there is no bright moon or a light source nearby, you can use a flashlight to illuminate objects: just compose the scene, opt for Bulb mode to keep the shutter open until needed, and illuminate the objects that interest us one at a time, such as a tree, a rock, hay bales, a truck and so on. Move the beam evenly over the objects trying not to keep it in one place for too long. When you have finished “painting” with light, simply finish the exposure and examine the result.
 The stains
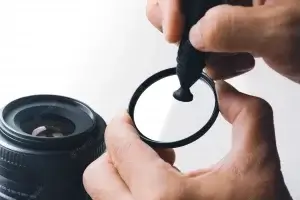
Dead pixels, lens smudges, and smudging can distract attention from the main subject of your image. In particular, the spots due to impurities on the lenses could appear in more than one photograph of you, thanks to the environment where you shot. You should always remember to periodically check the lenses and clean them from halos or stains but, if this is not possible, you can use the “Clone” tool present in many photo editing suites, provided that the problem is not too great.
The noise
Most of the new cameras allow you to shoot at very high sensitivities, even ISO 25,600, with not too much noise. For those who are not equipped with the latest models, all that remains is to reduce the ISO value or use some software products for noise reduction such as Noise Ninja, Topaz DeNoise, or Neat Image.
The composition
Image composition takes a lot of time, a lot of practice, a good eye, and some natural talent. Some photographers crop images when they don’t meet their expectations, but it’s still an artificial way of doing photography. The advice is to practice, study the different possible compositions and choose the one that most inspires us, perhaps with the help of the third party grid printed on the display.
The exhibition
Shoot in RAW and you can correct any small exposure errors made during shooting. Underexpose and do not overexpose as the burnt areas (too much light) have completely lost the information present inside them, unlike the dark areas. Always check the histograms and avoid shooting areas with a large dynamic range.
Also read: Types of Photography: A Complete List of Photographic Genres
Other Tips for outdoor natural light photography
When we are outdoors, the sun or the sky is often our main source of light. We cannot raise and reposition the Sun or adjust its intensity by turning a knob, but we can control the sunlight in several ways.
As we take pictures of our friends or family doing all the fun things we do in the summer, we also like to photograph them in these outdoor settings. We can also just have a plan to take some portraits of people outdoors.
One of the most basic outdoor photography tips for portraits is to move the faces of our portrait subject away from the sun or other direct light . This accomplishes at least two things. It allows the person to have a more natural expression as they will not squint and provides some nice modeling effects with the play of shadows and lights.
A simple collapsible reflector can be added to the mix to provide a nice effect light for the eyes or to fill in some of the deeper shadows under the chin or on the sides of the nose that occur when we move the subject away from direct sunlight.
Also read: Best Cameras For Landscape Photography
Look for the sky in outdoor photography
What I always suggest in natural light outdoor photography for taking pictures of people is to look for situations where the primary light source is the open sky without direct sunlight. As it is the sky itself, and the Sun, to provide the light.
The Sun is a point light source and the shadows produced by direct sunlight have sharply defined lines. In other words, it is often conflicting. This gives us interesting modeling effects, as mentioned earlier, which can be used to emphasize the texture of facial features, skin, clothes, hair, or when photographing inanimate subjects in addition to portraiture.
The sky itself is a great source of light, like having a softbox hundreds of kilometers wide. This light is soft and less contrasted, and we can use it to reduce the emphasis on texture or reduce the differences between light and shadow. Sometimes, the light from an open sky can be virtually shadowless.
The open sky is much cooler in cooler temperatures than in direct sunlight. If we’re shooting in RAW, we can easily adjust it in post-production, often with a simple click of a box or from a drop-down menu. If you shoot in JPEG, we can keep the white balance automatically or assign it as the open sky or whatever term the camera uses.
Also read : Unrivaled Guide to Long Exposure Photography
Get closer to the subject
Being outdoors in nature or in man-made areas gives us outdoor photography ideas that range from vast, sweeping panoramic views to areas smaller than these views such as trees, buildings, and other structures.
Be on the lookout for even smaller aspects of the scene. Sometimes, a single tree can be more interesting than a forest. A smaller part of that tree, a strangely bent branch, or part of a leaf could become your next subject. And if you find a butterfly or some other bright insect on that leaf, you have another subject for outdoor photography.
Many of the kit lenses on entry-level cameras have a close focus capability that can be used for small subjects. Often, we can get very close and then zoom in a little more to capture an image that we can turn into true art.
To get closer to the near limit of zoom lenses, we can add simple close-up filters, also known as close-up filters, to improve the close-focus limits of our lens. For subjects in the natural world, these close-up filters are a fantastic item to have in our outdoor photography gear bag. These filters are quite inexpensive and simple to use.
By zooming in on a smaller part of the scene or physically approaching only with our lens or filters, we can multiply our possible ideas for outdoor photography.
Protect your gear
Being outdoors is fun and offers a lot of photo opportunities, but it also adds degrees of concern for us. Just as we protect ourselves from damage by using sunscreen, comfortable shoes, and comfortable clothing, we can protect our cameras with padded bags, comfortable straps, and lens protectors such as hoods and UV filters.
Sometimes, those items were included in the kit we originally bought when we decided to move on to more serious photography, otherwise, they are inexpensive add-ons.
Use these outdoor photography tips and techniques to get the best out of any gear you already own and then add the budget accessories that you think fit your needs and shooting style.
Do you have any summer outdoor photography tips that you swear by and want to share? Drop us a line or join one of the discussions in our forum to let us hear it!
Outdoor Photography | infographics
